May 18, 2012

triple lemon chicken

some time ago i was spring cleaning the herb patch, and got rid of the two thymes that had gone a bit wild. the other was lemon thyme and while handling the plant i got this amazing lemon fragrance and got thinking that it would be a shame to toss all of it...so i saved some and figured out a way to use it.


took out some whole grain spelt pasta.


grated the zest of one organic lemon.


minced some thyme and mixed it with lemon zest.


squeezed the juice of the lemon on a few calamata olives.


placed some thyme springs even in the pasta water.


browned the chicken cutlets on high heat with some thyme sprigs.


poured in the olives and lemon juice, then added some cream and brought everything to a boil. the cutlets were quite thin so they were cooked pretty fast. you could do this with any part of chicken, and adjust the heat and cooking time accordingly.


before serving i took the cutlets out and poured the drained pasta into the sauce. served with iceberg-cuke-tomato salad with lemon vinaigrette. triple lemon? 1:lemon thyme, 2:lemon zest, 3: lemon juice. not a friend of olives, just leave them out. this is super easy and you have dinner in 15 mins.


May 16, 2012

when can i have plums?

the apple trees at the shack are very, very old and i've been, lately not so subtly, trying to convince certain someone that perhaps it was time to plant new trees. options were cherry and plum...i kinda wanted one of each but plum won. i'm sure i have the details of what kind of plum, and will share the info, if and when i find it...


garden area is very mature, the house was built in 1938. i was surprised to find that the soil is very rich, full of worms, under the 5 inch tightly packed to layer, that is. plums should be planted on a slightly elevated spot as they need good drainage. that is something i read and was something i was trying to do when choosing this spot. although the lawn area is quite big, there's winds, snow in winter and shade from other trees to consider. i hope the plum likes it here.


i used the same root-proof landscaping fabric as in the raised beds. i had this cute picture in my head, i'd plant some tiny flowers around the tree, but decided that i better make sure the plum makes till next year, at least, before dressing it up.


not everyone might have done this, more of the landscaping fabric...


...and mulch on top and around the tree. this would have been ideal, but there are villains...


...and protective fence in needed. good luck trying your teeth on this you &#¤! rabbits!


"sewing" wire wasn't easy and another kind of fencing will be used on future projects. it took me longer to make this than it took to remove the soil and plant the tree, and my hands were bleeding from the sharp edges as i'm really bad at wearing gloves. and that is why my hands suck up enormous amounts of moisturizer, when i remember to apply it...


elsewhere is the garden muscari have finally popped up properly and are feeding the bees.


these daffodils show up faithfully every spring. i don't know who has planted them, or when. i like their shape and the coloring.


this is one of the tulips that, when still bulbs, i first forgot to plant, the ones that might have gotten frost bite, the ones that i thought wouldn't even show up. they've been very slow to open...


...but i'm loving the colors, can't wait to see how they look when all open.


this is another mystery, how it ever got where it is...love the palest of yellow.


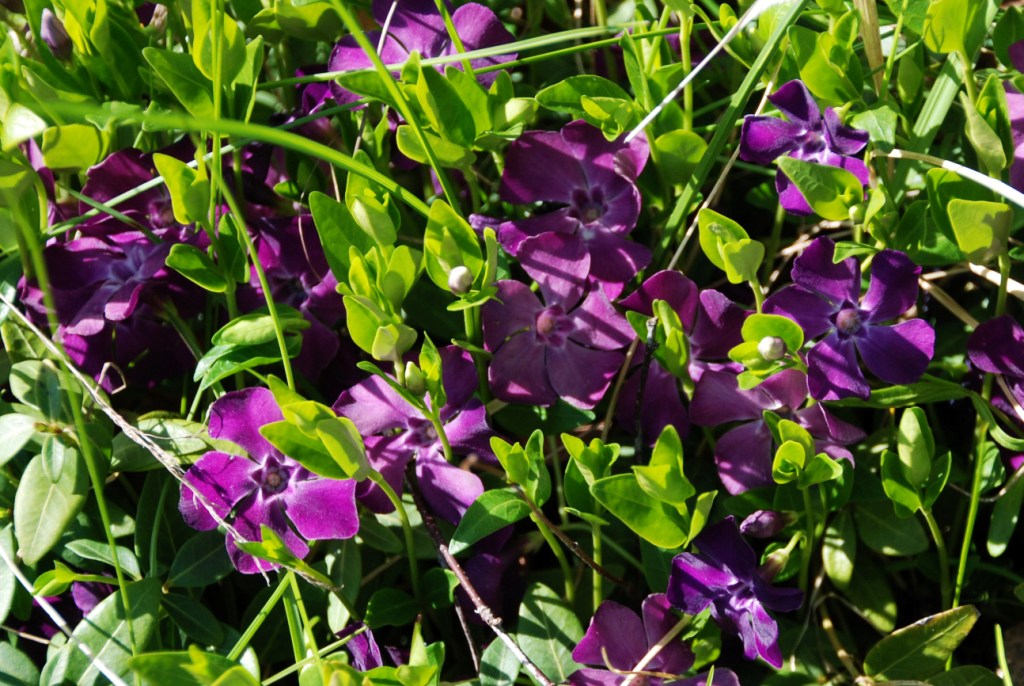
does anyone know what this is? another surprise visitor, i could bet money (if i was of the betting kind, that is) that it wasn't there last summer, nor earlier. i have a vague recollection that i tossed some seeds a few summers ago, could these be those? if so, what are they? i so need to start a gardening journal, with the raised beds it's important to remember what was growing where in order to fight plants pests and disease.


HAPPY BIRTHDAY LITTLE NIECE!


May 15, 2012

raised beds

i have been wanting to start a vegetable patch at the shack for years. there's been the issue of where to put it as there are several huge birch trees (1 can gulp up to 600 liters of water per day during growing season) and some of those birches need to be cut down in the near future (they are tall ones so careful planning needs to be done as into which direction they'll be cut to avoid major damages). there are underground plumbing and tanks (right where i'd like to have put it), but for the last 4 yrs my wrist has been the main hindrance. not to say that there's been a miracle cure, and the wrist certainly isn't any better after this job...

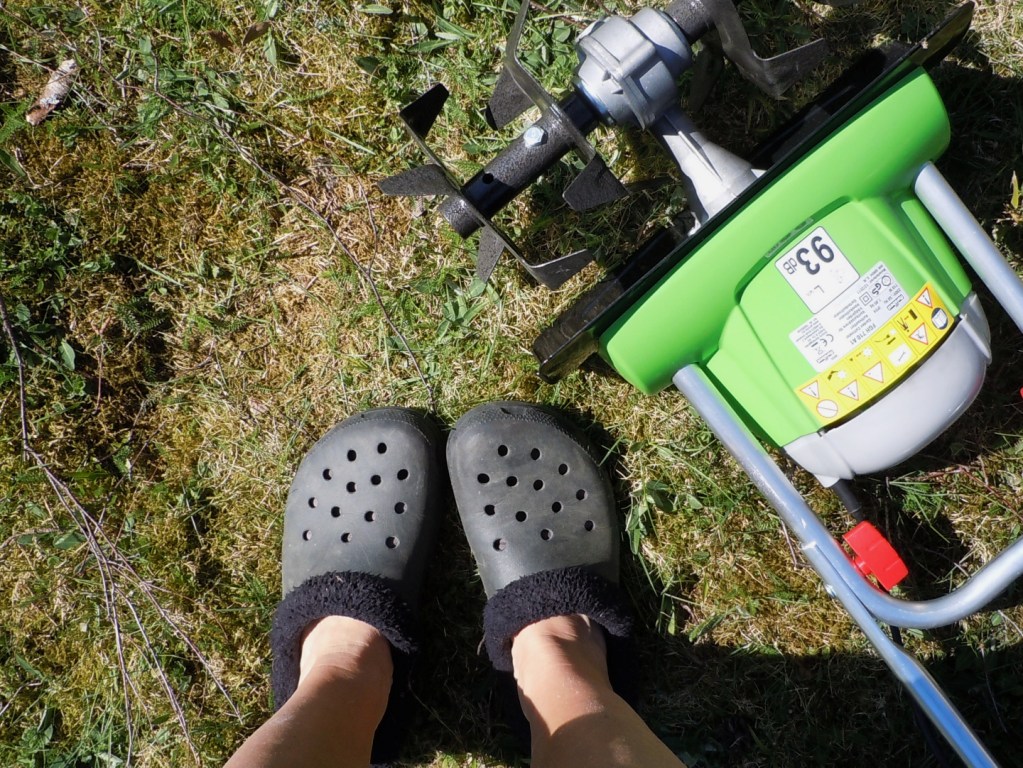
you might (or might not) remember the post where a truck delivered a lot of soil and some other stuff. i am quite sure that had it been for us to haul the 2000 liters of soil to the shack, i might still be dreaming about my patch 3 yrs from now. last week, when i no longer had any excuses and the weather was decent enough and i had this brand new "cultivator" (that needed assembly first) i got started.


safety first...


...so went and got me wellies on.


marked the area that i wanted to cultivate...


...plugged the machine in and started the grinding. after a short while i realized that perhaps this particular machine was too "junior" for the job. the grass (ok, thick layer of something that used to be grass and is/was now mixture of lots of roots and moss) was just flying around...


...but the machine did manage to break up the top...


...so that shoveling the loose matter off was somewhat easier. i removed 6 loads like this, and am now trying to figure out how and where to best utilize this soil, once it's been sleeping under covers until next spring.


now, this was what i discovered. it does look good, there are big juicy worms slithering about, but there is also a lot of roots (birch, rose, apple tree, who knows!)...


...so in order to make sure nothing unacceptable pops up in the beds, i used root-proof landscaping fabric to cover the whole area.


next it was time to lay out the boxes and make sure they are lever...


...close enough for me.


i had originally planned to have these side by side with paths in between, but then i got to thinking about the local rabbit population and how i would have address that once anything started growing...i decided that placing the boxes in a row would make building a fence somewhat easier, and that weeding and such wouldn't be too difficult even if they are like this.

as you can see, i also lined the boxes with the same landscaping fabric. probably an overkill, but it's more in order not to have the soil right on the wood so that the wood would last a bit longer. the boxes are made of heat treated wood, chemically treated wood should be totally avoided when growing something edible.


i had these sacks from last summer, i grew tomatoes and zucchini in them. they are so handy, everything a plant needs (actually 3 plants) is in the sack and you can have a tiny garden wherever (they even make "pools" for the sack so gardening on balconies is possible, the pool also stores water so you can go a way for a week without having to worry about watering), there is no weeding (always a huge bonus) and as there is little evaporation you don't have to water the plants as often as otherwise.


i had hoped the boxes would have filled a bit more...


...but no. after shoveling and barrowing umphteen loads (950 liter total) of soil, the boxes were done. a smart person would have asked the delivery guy to drop the huge sacks closer to where they were needed...


...now there is a path on the lawn and most muscles in my body are still screaming with pain, good pain i'm trying to convince myself. the wrist wasn't happy, but a few days on pain-killers took care of that. however, i'm afraid that after i'm done with current gardening plans (plum tree, raspberry, black currant and blueberry bushes), my next visit with the doctor in august isn't a day too soon.


i covered the beds as the air is filled with seeds of all sorts and i wanted to have some control as to what grows there.


next day i got my seeds out and hid them in the soil. if all goes well i should be getting radishes, carrots (did plant marigolds next to carrots as insect repellents, only to figure out later that instead of pot marigold (calendula) i should have planted common marigolds (tagetes), wonder if the insects will know the difference?...

hmm, where was i? radishes, carrots, parsnips, beets, leeks, something which i think is chard in english and kale. we'll see what we get to eat and what has delighted the local rabbit and deer populations.

i will keep the beds covered until something shoots up, and perhaps even after that, at least for the nights until the weather warms up.


and wouldn't you know, martha has written about raised beds, you can read about it here.

after getting all this done, i have already planted the plum tree, the berry pushes are desperately calling my name, more on them later...

May 14, 2012

torta con amaretti & banana bundt cake

torta con amaretti has been in the making for a long time*. i got the recipe almost a year ago when we were in malcesine and staying at the hotel internazionale. they had a nice breakfast buffet that always included something sweet.

one morning during our stay in the hotel i decided to have a taste of this particular tart, and after the first bite i knew that, while i don't enjoy amaretti, certain someone would love the tart. he did, so much so that i ended up asking claudia (her family runs the hotel) for the recipe. she says, modestly, "oh, i just whip it up".

a few days later she did give me the recipe, which goes:

ripieno
200g ricotta
1 uovo
2-3 cucchici latte
200 g amatetti (bisquit)
50 g zucchero

impasto
300g farina
100 g zucchero
1 bustina lievito
100 g burro

mettere in forno a 160C per 45 mins

i had assured claudia that i would know what to do if i just got the ingredients...


...measuring everything was the easy part...


...the machine did all the hard work, mixing the dough...


...at this point i was a bit hesitant as i had no clue as to how the dough (=crumbs?) should look.


went ahead by mixing the filling...


...well, the machine did.


i chose a loose-bottom tart pan that was closest to the size of claudia's tart and divided the dough in half, pressed the first half on the tart pan...


...spread out the filling (the aroma of amaretti was substantial!)...


...spread rest of the crumbly dough on top and baked in 160C for 45 mins. i have no idea if i should have done something else with the dough, like press it into two disks, or something...


...the baked tart smelled amazing.


i have to say that while i don't enjoy amaretti, nor almond liquor, this one was very tasty. i took some to work and it disappeared pretty fast, certain someone still loves it. i will make this another time, but in a square loose-bottom pan and cut smaller "slices" as they would make great tiny mouthfuls "of something sweet" with coffee, or as dessert. one thing is for sure, if you love amaretti, you will love this tart. i managed to do it with a finnish-italian dictionary, it goes to show that this is a fool-proof recipe. there are, however, several recipes (both in english and in italian) for this kind of tart if you wish to have a more detailed recipe.


banana bundt cake from myllyn paras (recipe in finnish). i baked this recipe for the first time at my brother's house a while back. they had a pile of bananas that were badly bruised, i knew none of the kids (including my brother) would eat them, and as it's always better to bake a cake than to toss food...

banana cake is always best when done with very ripe bananas. in addition to this recipe being very forgiving as to measuring (gotta love that!) it requires minimal mixing, hardest part is probably mushing the bananas.


you'll need

5 dl all-purpose flour
2 dl sugar
2 ½ tsp baking powder
2 tsp cinnamon
1 tsp ground ginger
2 dl cream (i used sour cream)
3 eggs
2-3 dl mushed bananas (2 to 3 large ones)
1 ½ dl liquid margarine (you can use melted butter but cool it before adding to batter)


start by preparing a 2 liter bundt pan. don't even think you might get away with a smaller pan, because you won't. i've had my share of banana vulcanoes in the oven, they are such a mess and the smell isn't nice. use a large pan, ok?

i couldn't find cinnamon (tragedy!) so i used the spice tree's sweet mystery dessert mix that has cinnamon in it.


next mush the bananas, mix the dry ingredients in a large bowl, then add the liquid ones including the bananas and mix well...


...and pour into the prepared pan and bake in 175C oven for 50 to 60 mins. now, if i hadn't cleaned so many burned banana vulcano lava-blobs (all that burned batter on the bottom of the oven is wasted cake!), i'd think the pan was too big. don't make that mistake...


...see how much it rises? most banana cake recipes call for baking soda, which i think is the main culprit for the volcano effect, but baking powder can be potent too. cool the cake in the pan for the first 15 mins.


then turn onto a wire rack to cool completely, with the pan on. the cake keeps well and will improve spending a few days in the fridge (wrapped tightly). sprinkling of powdered sugar will make the cake festive.


(* long time because i "lost" the recipe, or rather, misplaced it. i was looking for it several times and was always sure that i had put it in one particular cupboard with other recipes on the wait list. but it was nowhere to be found, until a few weeks ago when i was browsing thru martha's cooking school looking for something completely different and found the recipe between the pages of that book. how it ever got there...)